Building GIS Models I
Reading time
Content
In GIS, a model is a workflow that automates a sequence of geoprocessing tasks to solve a spatial problem or analyze geographic data. Models are typically created using visual interfaces, like the Model Builder in QGIS or ArcGIS, where users drag and connect geoprocessing tools and input/output data layers. To build a model, you define the input datasets, select the tools for analysis (e.g. buffer, overlay, raster calculation) and configure their parameters, linking them in a logical sequence. Models are invaluable for streamlining repetitive tasks, ensuring consistency in analysis and enabling non-technical users to run complex workflows without manual intervention. They also make workflows more transparent, easy to share and reproducible.
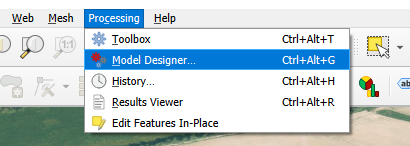
Model Designer in QGIS is located under the “Processing” menu.
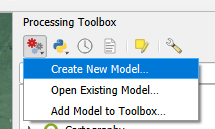
Alternatively, a new or existing model can be also opened from the “Processing Toolbox” panel.
Every new model starts with an empty canvas. You start creating a model by adding items into the canvas and connecting them together into a workflow. There are two types of items which form a model: inputs and algorithms.
- Inputs are the layers, values and properties which can be changed with every run of the model. Inputs are exposed via the user interface of the model when executed and any user running the model can select inputs of the model suited to their needs. Inputs can be mandatory (e.g. a layer to be used for processing) or optional.
- Algorithms are the processing tools used to perform the desired workflow. They are the business logic. Algorithms depend on the inputs defined for the model. In contrast to inputs, algorithms cannot be changed when running the model – to make a change in the algorithms in the model, one has to edit the model (hence creating a different version of the model).
Inputs and algorithms are connected into a sequence of tasks like a chain. The result of a model is called an output and is usually in the form of a new layer or layers, although it can also be just a selection or change of existing layer(s).
Tutorial: Cost Distance Analysis for Optimal Route Planning, the Model Approach
In one of the previous examples, the task was to perform a cost distance analysis for optimal route planning. We will now reuse that example and create a model capable of performing some of the sub-tasks in one step, thus simplifying the process.
- Let’s create a new model by opening the “Model designer” from the “Processing” menu, as described earlier. The empty canvas is our starting point.
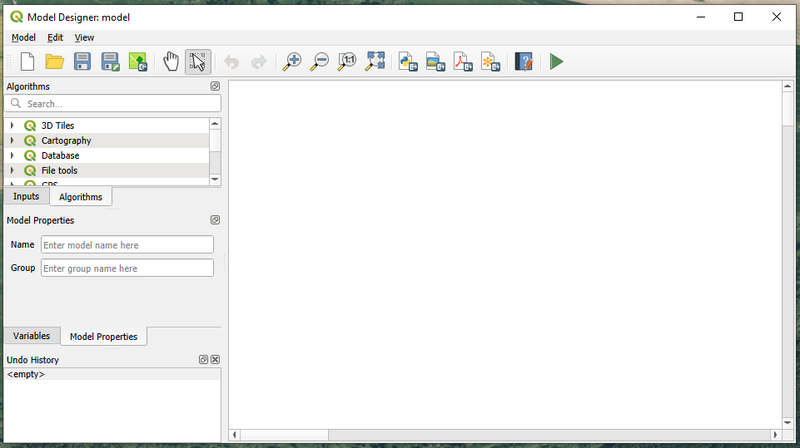
A new and empty model in QGIS’s Model Designer.
-
We will be creating our model in the order from inputs to the outputs. So first, define the inputs of the model. In our case, these are:
- digital elevation model (“DEM”),
- land use raster,
- route starting point and
- route final point.
Inputs can be added to the model from the list on the side of the Model Designer. Every input must be defined by the type of data it provides. So we will add our inputs as these types:
- digital elevation model (“DEM”) – Raster Layer,
- land use raster – Raster Layer,
- route starting point – Point
- route final point – Point.
-
As a next step, add the necessary algorithms in the model. They can be dragged and dropped from the “Algorithms” list on the side of the Model Designer or added with a double-click. In our task, we need algorithms:
- “Slope”,
- “Raster Calculator”,
- “Proximity (Raster Distance)” and
- “Shortest Path”.

Defining a DEM input as a raster layer, which is mandatory to run the model.

Four model inputs. For now without any mutual connection.
-
Every time an algorithm is added to the model, its parameters must be filled. This connects the algorithms with the inputs.

Defining a Slope algorithm with the “DEM” model input as the elevation layer to use for calculating the slope.
-
When an input is connected to an algorithm and then to another algorithm, the individual parts are connected with lines.

A ready-to-use model with interconnected inputs and algorithms.